Wednesday 27 March 2013

It's all gone hopping mad....

....well at least the weather has!

The spring birdies from my last post have frostbitten feet!

This week I've been cracking on with a geometric make for Le Challenge. It's been more fiddly than I thought. I've just a few more blocks to piece before I can put together the quilt top and show you a peak.

So in the absence of any new Easter creations I'm posting some pics of previous spring makes.
One of the benefits of being new to blogging is that they are new to you even if they are just old favourites to me.


Let me introduce you to Harriet; my Easter Hare. Most of my animal makes are created for my daughter or nieces, but this one is ALL MINE!


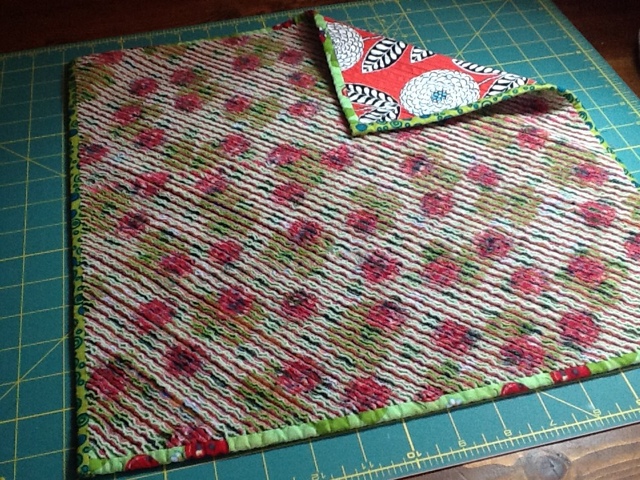
She's made from a Laura Ashley upholstery remnant picked up from a car boot sale. Most of it got used as a part of a patchwork squares picnic blanket, but there was enough left for Harriet. Her ears are edged with florist wire so she has a wide range of expressions!

She's well loved in this household; her arrival on the windowsill spells the imminent arrival of Chocolate eggs!


Next, meet my spring chicken, made using a Mellymade Designs pattern


She's weighted with pebbles in the base so she's a sturdy lady, rather like me!

Common Habitat:   the fireside hearth.
Migratory pattern:  centre stage for Easter. (Yes I know, chickens don't migrate!)

Mellymade Designs is the creative work of a talented local lady; Melanie Missin. I attended 'quilting' classes with Mel when I first started out and her passion was instrumental in getting me hooked on stitching. Recently she has added workshops at Sew Much To Do to her teaching programme.


To round off my Easter themed posting, here's one of my first ventures into appliqué. The shapes were kept simple and it's all a bit "twee", but it was a great project to hone my skills.


Happy Easter to all. x

Friday 22 March 2013

A little birdie told me........

.........spring is almost here.

So to celebrate I've made a flock of chirpy critters.


I used some scraps of tulip and Easter prints from previous springtime makes, and assorted buttons from my button stash. The only new materials were the cute co-ordinating ribbons used to make the tails.


The tails are my favourite bit. They flutter beautifully if you give the birds a jiggle!!

Check out my Professor Trelawney birdie!


I also wanted to pay homage to one of my favourite pieces of equipment in my sewing basket; the long handled hemostat.


Before I made this purchase, turning and stuffing was a fiddly, time consuming pain.

The beauty of the hemostat is that it clamps shut, so you can let it go without it letting go, making turning through a small opening a breeze.
There are other tools out there to make turning easier, but hemostats also simplify the stuffing process. It is far quicker and you can really get right into those hard to reach corners for a nice even result.

PLUS if I ever need to perform complex surgery in a hurry I'm all set to go! Win-win!

Finally, I thought I'd finish with a pic of the lovely handmade beech cotton reels I got from my darling daughter for Mothers Day. I love them all the more because they are made locally at Hemington Hall.  They look even more beautiful now they are wound with some of the prettiest ribbon from my stash.


Friday 15 March 2013

Le Challenge

The eagled-eyed amongst you may have noticed a new button over to the right of my page.

I'm linking up with "Le Challenge", a new monthly challenge open to all types of crafter whatever your poison! Not just stitching; anything goes.


Le Challenge

A new theme will be announced on the 15th of each month and you have one month to complete.

The first theme is Geometrics - so lots of scope for interpretation.

Thanks to the organisers: Lucy @ Charm about you, and Nat at Made In Home.

Let the games begin!


Thursday 14 March 2013

Lady Luck gives me a wink...

Last week I was in the middle of a somewhat stressful and melancholy Monday when I received the cheering news that I'd won of a fantastic giveaway over at Very Berry Handmade.

So now I have even more reasons for it being my current favourite blog!

Today a padded envelope dropped through my door containing..............


Material World: The Modern Craft Bible by Perri Lewis.

The Modern Craft Bible is a "dip into" book, that should be accompanied by a cuppa or a glass of vino - provided you don't spill!

After a flyby discussion of basic materials and essential techniques, it moves on to cover fifteen different crafts ranging from Appliqué to Quilling.

Each chapter contains 'how to' instructions, illustrated with sketches; so you can try a taster of whichever craft grabs your fancy. In addition, there are detailed projects that offer a modern twist to old favourites, this being the main premise of the book.

I was disappointed that there weren't more photographs in a book that has the potential to be a visual feast, (excuse the cliche!). But, what is missing in quantity is made up in quality; the photographs used are crisp, modern and fun. I just wanted more!

My favourite element of the book are 'the masterclass' sections which comprise of tips and insights from experts from within each field. These little gems are what makes this book stand out from similar titles.

It's a book you wouldn't necessarily justify buying for yourself, but as a gift, or in my case a prize! It's a delight.

Thank you so much Ali at Very Berry Handmade!


Saturday 9 March 2013

A day out at the Spring Quilt Festival.

This weekend it was the Spring Quilt Festival at Duxford Imperial War Museum (IWM). It was the second time Duxford IWM has been the venue for this event. The first time was last autumn when it served as a late venue replacement following a fire at the regular venue of Chilford Hall. Personally, I preferred the attractive setting and the eating facilities at Chilford. But Duxford is is bigger, airier, and, on this second-time of hosting, had a more structured layout and wider aisles.

The usual suspects of exhibitors were in attendance. After four visits I've concluded it doesn't seem to vary a great deal from show to show. However, there are always plenty of new fabrics and puzzling gadgets to catch your eye.

At every show I'm simply amazed and humbled by the quilt displays. If photography were permitted I would share my favourites with you. One pairing in particular sticks in my mind for all the right reasons - A monochromatic landscape of Fenland Norfolk, using both pigment and thread, with it's negative image alongside. Stunning and a little bit eerie.

So, after almost four hours of flitting between various stands, breathtaking quilt displays, and of course the pop-up cafe, I limped (ok, drove) home with a sore back and achy feet.

I was very restrained in my shopping, just as well because I was parked so far away I'd have needed a strapping porter had I purchased my usual amounts. But there's a pleasing idea for the suggestion box!

First, some very cute beach house linen, for which I have plans for a beach bag with a waterproof lining. 


A trio of Moda (I think!) FQs in fresh lemon and aqua. They were a 'just because' purchase due to the fact they made me feel like spring is on it's way.


A few bits of equipment.

Some quilting gloves and a specialised Curved Corner Cutter from Creative Grids for me.

A retractable froggy tape measure (every sewing box needs one - honest!) and some Pom Pom Looms for my daughter.

All displayed here on some Scandi-style fabric I'm adding to my Christmas stash. It's never too early!


 Finally, there was one further purchase. A little something for my poorly friend at home nursing flu and hence missed out on coming.
But she's a fellow blogger and follower so I can't reveal here!


Friday 8 March 2013

Chenille the sequel.....

This week, I had another bash at Chenille quilting. Implementing the technique tweaks I picked up first time round, I made another FQ mini quilt.


Fabric credits: (left to right in glorious sunshine)

Flea Market Fancy, Bouquet in Grey by Denyse Schmidt

Elements Floral Impressions by Makower - (from the bargain bucket)

Garden Trellis in Taupe by Micheal Miller

A bright floral print - unknown,  (again from the bargain bucket)

Flea Market Fancy, Eyelet in Grey by Denyse Schmidt

What I did differently:

▪ At the quilting stage, I roughly doubled the spacing between each line - a shade under 1/2" versus 1/4" the first time round.

▪ At the cutting stage, I made a scissor snip at the beginning of each row, so combined with wider spaced quilting it was much easier to slip in the chenille cutter.

▪ I went with a wider binding to echo the wider quilting.

▪ I only washed and tumbled once. At this point I was happy with texture, I liked being able to make out the Flea Market Fancy print and retaining the vibrant orange. With another print I may have washed and tumbled at least once more.


The finished product.


Both mini quilts side by side for a texture comparison.


My conclusions:
▪ Quilt line spacing - 1/4" spacing is too tight for comfortable cutting, but, anything from 2/3" upwards seems fine, and how wide you go is dependant on the look you want to achieve.
▪ Similarly, how many times you wash and tumble depends on how "fluffy" you want the end result. Bare in mind more "fluff" results in a more abstract looking print and more subdued colours. So once again choices will vary from project to project.

Finally, here's the duo in use as covers for my treasured sewing project baskets.


If my amateur 'makes' inspire anyone to have a first go at chenille quilting I would very much like to see the results and hear what worked (or didn't work!) for you.

Tuesday 5 March 2013

Take the Alpaca challenge......

Let me introduce you to one of my four-legged obsessions........Alpacas.
I could wax lyrical about the joys of Alpacas and why I'm captivated by these adorable, fuzzy Camelids. But, that would fill a whole separate blog! I will settle for a couple of pictures.


So, it will come as no great surprise to hear I'm elated that Monaluna's fabric collection, Modern Home, has reached UK shores.


You can find it in the UK at The Village HABERDASHERY.  I for one, will be making a purchase as I'm quite taken with the whole range.

However, the camelids stars of this range are not Alpacas. They're Llamas. I've nothing against Llamas, except perhaps the spitting, but they just don't hold the same appeal for me as their smaller, cuter cousin - the Alpaca.


So your mission, should you choose to accept it. Is to recommend some appealing Alpaca fabrics. Nothing too cartoony (is that a word?) or cutesy. Silhouettes appeal, but aren't essential. The final requirement is that it's available or can be shipped to the UK.

Who's game?


Sunday 3 March 2013

Silly Banana's, Cocktails and the Small Blog Meet......

Being so new to this blogging malarkey I'm still working out how the pixies make it all work! What I do know is that they are clever little chaps those pixies!

My crafty pal, who inspires me on a regular basis and blogs at Silly Banana Sewing, gave me some top tips over cocktails last night. It's just a shame she didn't impart these pearls of wisdom on a teetotal evening!

One gem that stuck with me was the recommendation that I check out the "Small Blog Meet" over at Lily's Quilts.

Basically, if you are a blog with fewer than 50 followers and would like to get to know a few more crafty souls in the blogosphere then this is the perfect Linky Party for you. Even if you aren't a blogger its still a great way to check out the creative talents of people who may otherwise slip under your radar.

Lily's Quilts


Go on, you know you want to. Give it a click.


Saturday 2 March 2013

A new toy, a new technique, and a spectacular blister..............

At Wednesday club last week the lovely Totta introduced a couple of us to the wonders of Chenille quilts. How have I gone two years without coming across this quilting technique? So simple, yet such an effective result!


More importantly it's the perfect excuse to buy a new bit of kit - a Chenille cutter. I love a new toy!


There's a wealth of tutorials online for the uninitiated like me. But I was so keen to give it a go that jumped in without further investigations and made a few basic errors that could have been easily avoided. More about that to follow!

The other thing I'm liking about chenille quilting is that Its a great way to "stash-bust" some of my more suspect fabric choices for the lower layers. All that matters is that they give the right flash of colour.

 
These are the fabrics I chose for my mini sample quilt.

The ladybirds for the top (left over from my daughter's forgotten ladybird stage), miscellaneous bright fabrics to make up the lower layers and......... because I actually do like this fabric and I want to see it in its full glory.......... Michael Miller's Zinnia Path for the backing on the far left.


So off I went!


I layered my fabrics, basted with a tacking stitch, and quilted them all together using diagonal lines 1/4" apart, repeated across the whole piece.

With hindsight this was too close together. The main reason being there is less fabric to create the frilly chenille effect. Mistake number 1.


Next stage was the cutting.

Not as easy as I thought. Partly due to the fact I'd quilted too close together and partly because the initial cut is quite tricky.

I found the best way was to do a scissor snip to start each row then slip the chenille cutter foot under the fabric layers. That worked well but I discovered this after blistering my finger. Collective sympathetic noises please.


I also managed to cut across into a previously cut row when I was rushing towards the end. This shouldn't really be possible using the specialised cutter instead of scissors but I managed it! So my mini quilt became a bit more mini when I squared up after cutting. Ah well, that's what practices pieces are for.


Next a quick bit of binding. In fact very lazy binding since I didn't even mitre my corners on this sample piece. Yawn, yawn.........not my favourite stage of any quilt. Does anyone out there like doing binding? Am I missing a hidden joy?

I was desperate to get washing and tumbling my mini quilt to see if there was enough fabric between my quilted rows to make a pleasing effect. The answer is.............


Not too bad!

In fact better than I was expecting.

I washed and tumbled twice. A third time may have given a better texture but the top was starting to look a bit too washed out for my taste.

The result would be more sumptuous and the ladybird print more abstract with wider spacing between the quilted lines.


But overall I'm happy with this test piece and my lessons learnt. Plus I got rid of that hideous Mickey Mouse Halloween FQ. So its a win-win!


Plasters at the ready. Chenille cutter poised. I'm ready to create again.....